Create Clinic Account on Riayati PO (Post Office)
Step-1: Register your organization if you don’t have an account on the Riayati Post Office.
Step-2: Or login to the account by using your credentials if you already have an account.
Generate your Riayati PO API Password
Step-1: Login to the Riayati Unified Portal using the following URL https://po.riayati.ae/.
Step-2: Click on Facilities and select your facility.
Note: This action displays the facilities screen and the list of facilities the user is assigned to, within an organization.

Step-3: Once you have selected your facility, a similar window (below image) will appear, select API Password tab on the right most side as shown below:
Note: Only the Organization/Facility admin can access this feature.

Step-4: Below screen will be visible upon accessing the button, click Generate button to enable the feature.

Step-5: Once you click Generate, a warning pop-up message* notification will notify the USER that a new API password will be generated upon this request.

Step-6: Confirmation/Cancel
Step-7: The warning message will display the following:
“Password Generation Warning”
- If you are a non-integrated facility, please ignore this warning and click on Confirm.
- If you are an integrated facility, this action needs to be well aligned with your technical team as it can result in loss of connectivity to the Post Office. Click on Confirm to proceed or cancel to ignore this request.”
- If the action is “Confirm”, an automatic email will be sent to the registered email address of the Organization/Facility admin who generated the new API password with the password details.
- The password should be immediately communicated with the facility’s technical team to update the API credentials and resume the connectivity to the Post Office.
- There is no limit on the password generation so any facility can regenerate the password as required.
- The username will always be the license number of the facility that is provided by MOHAP. Please refer to the Providers list on the Unified Portal to find the facility license number for Providers. For Payers, please refer to the Payers list on the Unified Portal to find the facility license number/ID.
- Notes:
- A separate email will be sent to other admin accounts of Organization/Facility to notify that their POST OFFICE (TMB) Credentials have been updated. The password will not be shared with the other admin accounts.
- Riayati team will not receive or have access to the generated password. It is the full responsibility of the facility admin to maintain this password and communicate it to their technical team or system vendor.
- There is no change on the authentication mechanism, you will be passing this password in the header section along with the username. (The username is the facility license for providers and the Payer ID for payers).
Add the API Username and Password in Medic
Step-1: In Medic, go to the Insurance Configuration under the Settings module from the admin account, as highlighted in the below image.

Step-2: The below screen will open.

Step-3: Add the Username and Password and click Configure button, as highlighted in the image below.
Username: MOH License number.
Password: Sent to the admin’s registered email address.

Medic and Riayati PO Linking
Step-1: Generate Doctor Accounts on Riayati PO Clinic Account.
Step-2: Medic account and doctors account will be linked with riayati PO.
Step-3: These Doctors would then be able to Generate eRX Prescriptions from within Medic Encounter by clicking the Generate ERX Button.
Notes:
1. Only clinicians can generate eRx.
2. eRx can be generated only for insurance patients.
3. In order for an eRX to be generated the Insurance Details of the patient must be entered previously in the Patient Profile Insurance tab
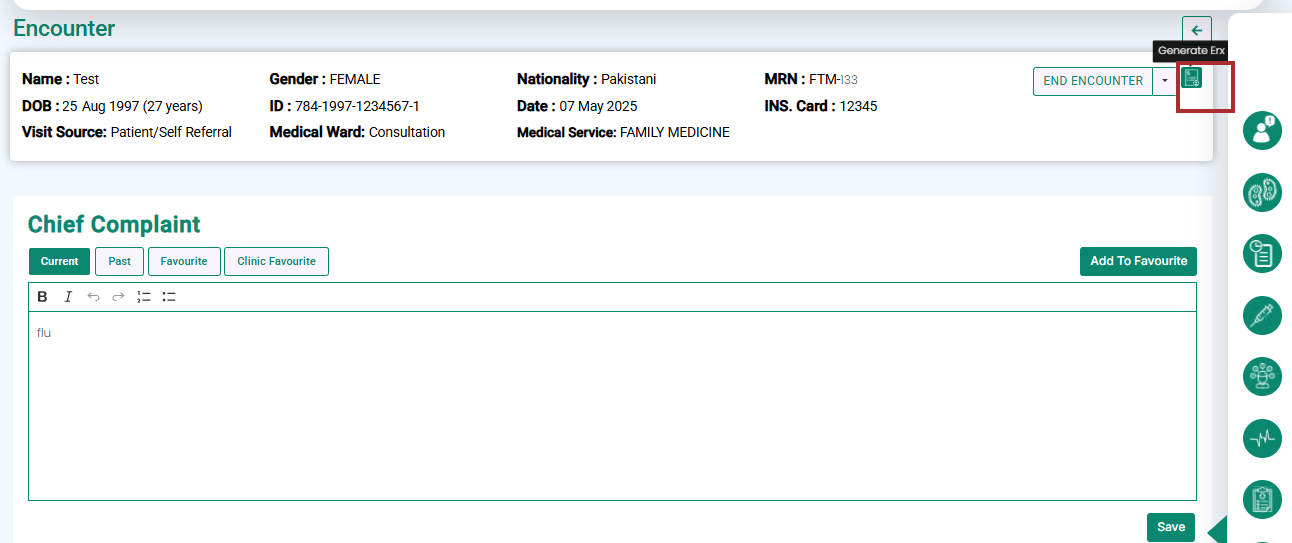
eRx Generation
Step-1: Start the encounter of an insurance patient from the doctor’s account and add a prescription.
Step-2: Click the “Generate Erx” button as highlighted in the below image.
Step-3: Medic will open a screen displaying the patient details, insurance details and encounter details.
Step-4: Click the “Submit” button from the bottom-right of the screen.
Step-5: A pop-up will display the Erx number on the screen.


